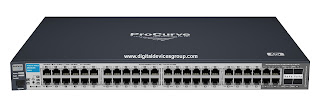
HP 2510 Switch Series comes in 2 models.
1)
48 port model
2)
24 port model
The most striking features of this switch includes 24 to 48
10/100 fast Ethernet ports, layer 2 managed feature, 2 mini GBIC slot, fan less
design and enhanced manufacturer warranty. This number. 1 class of switch is
designed to deliver essential networking solutions for small to medium to large
scale enterprises.
Here I am going to tell you how HP 2510 Switch Series can be
utilized as a home networking device as there are various small businesses that
have their setup at their residence places. Things that you will require
include an HP 2510 Switch Series and Ethernet cables.
With HP 2510 Switch Series, you can connect all of your
workstations so one can share files. You need to plug adapter of a switch.
Power on the computer/laptop, insert disc that came with the switch and follow
the on screen instructions to install software.
Now you need to hook the Ethernet cable into the cable modem
and connect the other end to the switch. Now plug another Ethernet cable into
any of the switch port and connect the other end with your computer.
Click on the CONTROL PANEL of computers START MENU, scroll
down and double click the entry of “ NETWORKING AND SHARING CENTER” and then
click the link labeled as CONNECT A
NETWORK at the left side of the screen. Now click WIRED NETWORK, scroll down
and locate entry of your network switch and then click CONNECT button. If you need other computers to be networked then connect an
Ethernet cable with those systems and repeat the procedure and here you are
done with the settings of HP 2510 Switch Series.
No comments:
Post a Comment